操作環境: MAC OS
MAC端的準備動作:
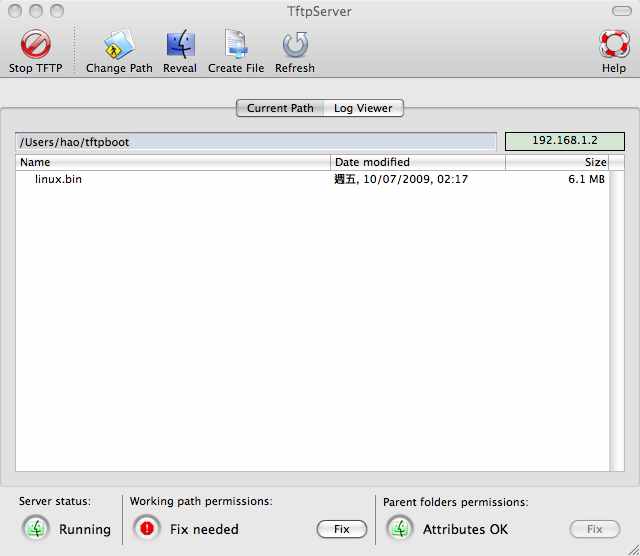
(1) 先下載安裝tftp server for MAC OS, 並且安裝
到此下載TFTP server 3.2.1 for MAC
(2) 在家目錄下建立一個tftpboot的目錄.
(3) 下載DD-WRT的image file, 我目前抓的版本是v24-sp1, 並將其拷貝到tftpboot的目錄
下載網址: http://www.dd-wrt.com/dd-wrtv2/downloads/stable/dd-wrt.v24%20SP1/Consumer/Fon/Fonera/linux.bin
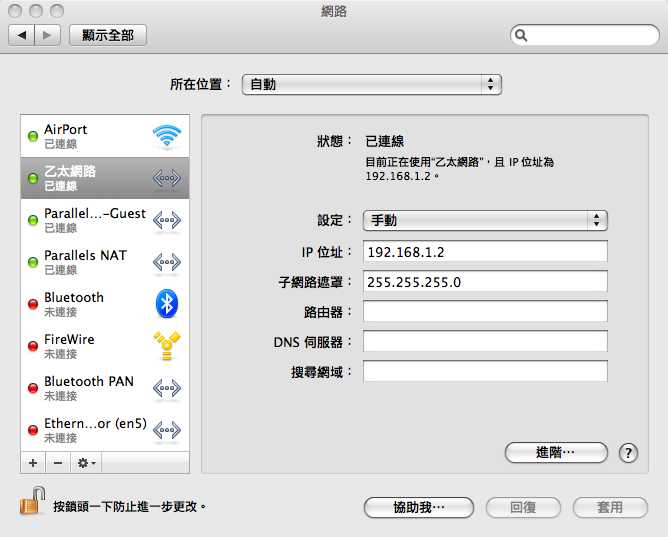
(3) 將電腦的 IP 改為192.168.1.2

(4) 執行tftpserver.app, 選擇』Change Path』, 把路徑指到上面所建立的tftpboot的目錄, 並且按下』Start TFT』來啟動server

接下來準備破解Fon+的firmware.
(1) 開啟終端機.
(2) 建立一個break.bin檔, 這個目的是建立一個中斷字元檔(^C), 來送給Fon+. 在終端機輸入如下
echo -e "\0377\0364\0377\0375\0006" >break.bin(3) 將網路線接到Fon+的LAN port, 先不要把Fon+的電源接上.
(4) 接上Fon+的電源後, 需要在1~2秒內在終端機中執行下列指令
nc -vvv 192.168.1.1 9000 < break.bin; telnet 192.168.1.1 9000若成功的話將出現Redboot的提示符號, 如下
Connection to 192.168.1.1 9000 port [tcp/cslistener] succeeded!
== Executing boot script in 1.990 seconds - enter ^C to abort
Trying 192.168.1.1...
Connected to 192.168.1.1.
Escape character is '^]'.
RedBoot>
若沒有出現RedBoot的提示符號表示失敗了, 拔掉Fon+電源, 重新執行此步驟, 直到成功為止.
(5) 設定tftp server address. 指令 "ip_address -l 192.168.1.1/24 -h 192.168.1.2"
RedBoot> ip_address -l 192.168.1.1/24 -h 192.168.1.2
IP: 192.168.1.1/255.255.255.0, Gateway: 0.0.0.0
Default server: 192.168.1.2
RedBoot>
(6) 清除RedBoot file system 中舊的檔案, 指令 "fis init -f"
RedBoot> fis init -f
About to initialize [format] FLASH image system - continue (y/n)? y
*** Initialize FLASH Image System
... Erase from 0xa8030000-0xa87e0000: ...........................................................................................................................
... Erase from 0xa87e0000-0xa87f0000: .
... Program from 0x80ff0000-0x81000000 at 0xa87e0000: .
RedBoot>
(7) 從tftp server 載入DD-WRT 的image file. 指令 "load -r -v -b 0x80041000 linux.bin"
RedBoot> load -r -v -b 0x80041000 linux.bin
Using default protocol (TFTP)
|
Raw file loaded 0x80041000-0x80662fff, assumed entry at 0x80041000
(8) 將image file寫入RedBoot的file system中, 並取名為linux. 指令 "fis create linux", 注意!! 這個動作可能需要45分鐘, 請耐心等候.
RedBoot> fis create linux
... Erase from 0xa8030000-0xa8652000: ...................................................................................................
... Program from 0x80041000-0x80663000 at 0xa8030000: ...................................................................................................
... Erase from 0xa87e0000-0xa87f0000: .
... Program from 0x80ff0000-0x81000000 at 0xa87e0000: .
RedBoot>
(9) 執行"fis list"來確認是否有寫入
RedBoot> fis list
Name              FLASH addr  Mem addr    Length      Entry point
RedBoot           0xA8000000  0xA8000000  0x00030000  0x00000000
linux             0xA8030000  0x80041000  0x00622000  0x80041000
FIS directory     0xA87E0000  0xA87E0000  0x0000F000  0x00000000
RedBoot config    0xA87EF000  0xA87EF000  0x00001000  0x00000000
RedBoot>
(10) 執行"fconfig -d" 來修改RedBoot開機動作.
RedBoot> fconfig -d
Run script at boot: false ? true
Boot script:
.. fis load -l linux
.. exec
Enter script, terminate with empty line
>> fis load -l linux
>> exec
>>
Boot script timeout (1000ms resolution): 255 ? 5
Use BOOTP for network configuration: false ?
Gateway IP address:  ?
Local IP address: 192.168.1.1 ?
Local IP address mask: 255.255.255.0 ?
Default server IP address: 192.168.1.254 ?
Console baud rate: 9600 ?
GDB connection port: 9000 ?
Force console for special debug messages: false ?
Network debug at boot time: false ?
Update RedBoot non-volatile configuration - continue (y/n)? y
... Erase from 0xa87e0000-0xa87f0000: .
... Program from 0x80ff0000-0x81000000 at 0xa87e0000: .
RedBoot>
(11) 執行"reset" 使Fon+重新開機.
(12) 待Fon+重開機後, 在PC上開啟http://192.168.1.1 來設定DD-WRT
參考資料:
http://www.dd-wrt.com/wiki/index.php/LaFonera_Software_Flashing
http://tkoshima.net/mt/2008/04/27/200804271327.php
