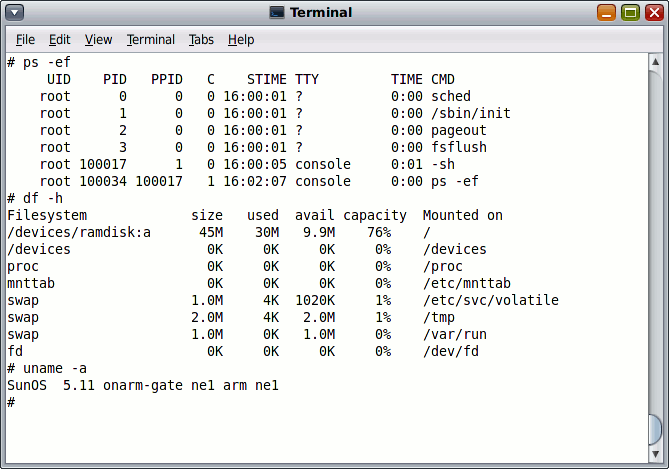
OpenSolaris for ARM
剛剛看到這個消息:First OpenSolaris ARM release
專案網址:OpenSolaris Project: ARM Platform Port
而且支援ZFS喔, 看來以後embedded system 的OS又多一個選擇了.

由於自己常常忘記該如何進入single user mode.
所以就把它記在blog.
Continue reading »

Nexenta 是一個以OpenSolaris 為核心, 以Ubuntu為使用者介面的作業系統.
Nexenta目標是想要有Solaris般的穩定, 以及Linux般的容易上手。
ZFS及iSCSI的支援也是Nexenta最吸引人的地方. 所以呢, 拿它來當做ZFS base的NAS, 是最恰當的了.
Nexenta Core Platform 2.0 具有以下特點:
#OpenSolaris build 104+ based with critical patches.
# Over 13000 packages in the repository.
# Based on Ubuntu 8.04 LTS (Hardy Heron) repository
# This includes latest dpkg/apt, gcc, binutils, coreutils, perl, python, ruby, Qt libs, GTK libs, etc
# SMF support added for server applications like apache, mysql, postgresql, exim4, etc.
# 100% native Debian environment, easy to upgrade, easy to use
# Includes Vim and screen by default
# Addition of latest devzone version to the CD.
# Includes apt-clone which brings zfs power to apt-get.
想要試試的人, 可以到http://www.nexenta.org/os/Download下載來玩玩.
參考http://cha.homeip.net/blog/archives/2008/10/_virtualbox.html#more
首先, 先建立好Gust OS的設定.
我是比較偏好用GUI來設定Gust OS啦. 若你是console狂熱者, 那就參考上面的link來做吧.
記得, 在設定Gust OS時, 要啟用VRDP server喔
但是啟動Gust OS的話, 我就想要在console中啟動. 因為我不想看到Gust OS佔用我的畫面. 要看Gust OS畫面時
用rdp client軟體來看就OK啦.
在console中啟動Gust OS方式如下:
VBoxManage startvm "虛擬機器名稱" -type vrdp
看到這個東西ZFS Automatic Snapshots SMF Service 在某種層面上和Mac的Time Machine好像喔.
目前最新的好像是0.11版
找時間把它弄到家裡的Server來試試看. ![]()
最近家裡的Solaris server的NIS一直都沒有搞的很清楚.
這裡有詳細的解說.
現記下網址, 等有空的時候再努力研讀吧~~
PS:懶惰的個性又在作祟了 XD
以下文章來至於http://edwardhuang.pixnet.net/blog/post/15645490
========================================================================
在 solaris 中,並不像其它的 UNIX 系統一樣,要利用 NFS 來 export硬碟是去修
改 /etc/exports. 而是要去修改 /etc/dfs/dfstab 這個檔. 設定的方法如下:

利用 share 來 export 硬碟,share 的參數如下:

Attrib         Description
===============================================
-ro          Export read-only, or of used in the form -ro=list, restrict
             access only for the listed hosts.
-rw          Export read-write, or if used in the form -rw=list, allow
             writing only by the listed hosts.
-root=list   Lists hosts permitted to access this filesystem as root. Other-
             wise, root access from a client is equivalent to access by the
             user nobody (usually UID -2).
-anon=n      Specifies UID used for requests coming from an unknown user.
             If not specified, defaults to nobody.

以下舉一個例子,說明 /etc/dfs/dfstab 的寫法.

#       Place share(1M) commands here for automatic execution
#       on entering init state 3.
#
#       Issue the command '/etc/init.d/nfs.server start' to run the NFS
#       daemon processes and the share commands, after adding the very
#       first entry to this file.
#
#       share [-F fstype] [ -o options] [-d ""] [resource]
#       .e.g,
#       share  -F nfs  -o rw=engineering  -d "home dirs"  /export/home2

share  -F nfs  -o rw=sparc,root=sparc  -d "File System" /
share  -F nfs  -o rw=sparc,root=sparc:sparc1:sparc2  -d "User Directory" /usr

1.第一行 share 是把 / (root) share 給一台叫 sparc 的機器,且權限為可以 rw.
2.第二行同樣是把 /usr 這個目錄 share 給 sparc,sparc1,sparc2 這三台機器,
  權限亦為 rw.

 exp.    share  -F nfs  -o rw=sun2,root=sun2  -d "sun1_home" /export/home
  or      share -F nfs -o rw,anon=0 /export/home

修改完之後,以 root 的身份執行 shareall 即可.

檢查 /etc/dfs/sharetab 是否編輯成功
還有另外一篇http://edwardhuang.pixnet.net/blog/post/15645154
solaris NFS file server
1.How to Start and Stop NFS server
  #/etc/init.d/nfs.server start
  #/etc/init.d/nfs.server stop
2.開機自動分享nfs的檔案系統
修改
/etc/dfs/dfstab檔案
#vi /etc/dfs/dfstab
會看到以下畫面,#是註解

#    Place share(1M) commands here for automatic execution
#    on entering init state 3.
#
#    Issue the command 'svcadm enable network/nfs/server' to
#    run the NFS daemon processes and the share commands, after adding
#    the very first entry to this file.
#
#    share [-F fstype] [ -o options] [-d "<text>"] <pathname> [resource]
#    .e.g,
#    share  -F nfs  -o rw=engineering  -d "home dirs"  /export/home2
#   上面有簡單的說明,以下兩行是自己設定的
share -F nfs -o rw,anon=0 -d "nfs_share" /export/home/nfs
share -F nfs -o ro,anon=0 -d "mp3_share" /export/home/samba

3.開機後手動分享檔案的方法
#share -F nfs -o rw,anon=0 -d "nfs_share" /export/home/nfs
#shareall
這樣就可以將檔案分享出去了

4.mount 已經分享的NFS檔案系統
#mount -F nfs ipaddress:/patch mount point
example:
#mount -F nfs 10.0.0.1:/export/home /mnt

4.取消分享的方法
#unshare -F nfs /mnt
取消所有的分享
#unshareall

5.查看分享了哪些檔案
查看server本身有哪些分享

#share
查看別台server 有哪些分享
#dfshares -F nfs ip address or hostname
example
#dfshares -F nfs 192.168.11.200
